The DICOM configuration allows the user to add/edit DICOM repositories. These repositories can be local folders containing DICOM files, or DICOM network servers located whether on a local or a remote computer. The DICOM Dump uses the DICOM Dictionary to identify information in the DICOM header. Check the How-To guide for more information on configuring the NanoSPECT’s DICOM Servers in VivoQuant.
Getting There
The DICOM Repository Editor can be accessed in three different ways.
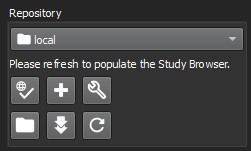
Firstly, it can be accessed via the Repository panel in the Data Browser. To open the Data Browser, click the ![]() icon.
icon.
The second method is by selecting the Configuration option in the Tools menu, and then click on the DICOM panel.
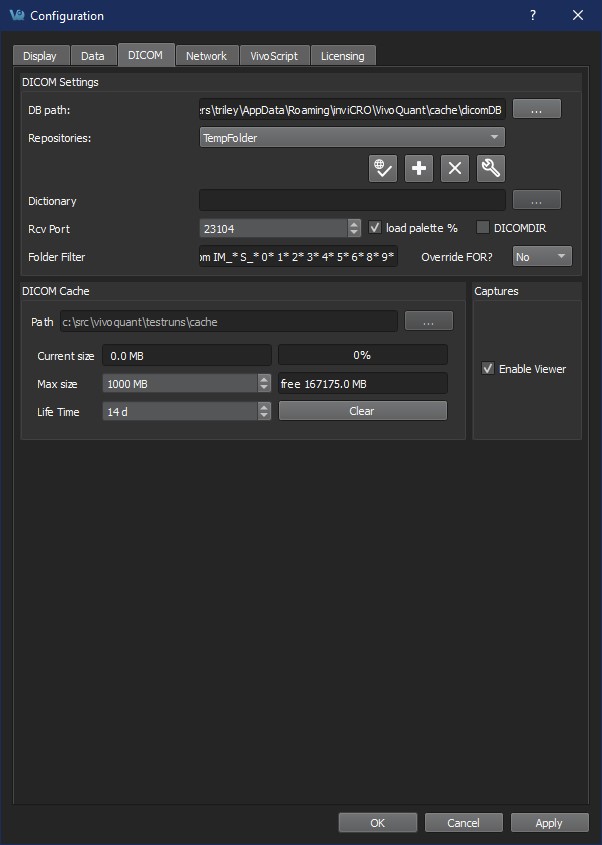
The third method is by opening the Configuration panel using the “Ctrl+Shift+C” shortcut. For more information on keyboard shortcuts in VQ, please see Keyboard Shortcuts.
Data Browser Repository Panel
The DICOM Repository panel, in the Data Browser, is the most convenient location for adding and editing repositories, including DICOM Servers, local folders, and PACS Servers.
| Option | Description |
|---|---|
| Repositories | List of available repositories. The bank of buttons immediately beneath the pulldown menu operate on the selected repository in this field. Please click here to learn more about the DICOM repository section of the DICOM browser: |
| Checks connection to DICOM repository. Local folders are verified to exist and a C-ECHO is sent to DICOM servers. | |
| Adds a new repository. | |
| Edit: Opens the DICOM repository editor. | |
| Opens a Windows Browser that can be used to select a local folder as a repository. | |
| Fetches all DICOM meta data. | |
| Removes repository from list. |
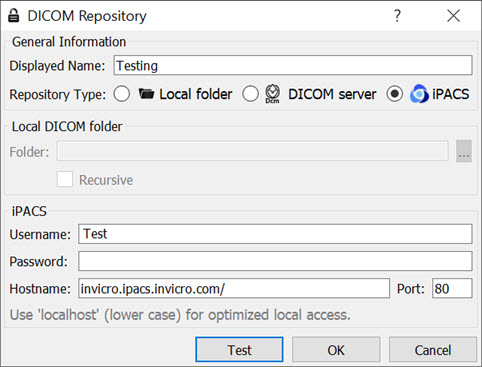
DICOM Repository Editor
The DICOM repository editor is used to add repositories, including local folders, DICOM Servers, or iPACS Servers.
| Option | Description |
|---|---|
| Displayed Name | Name as shown in the repository selection box. Can contain any alphanumeric character. |
| Repository Type | Indicates the type of repository containing the study data to be loaded into VivoQuant. |
| Local folders are directories available on the local computer (also via a shared network). Directories containing many files might take longer to scan. In this case, a DICOM server will perform better. | |
| DICOM servers are network services on the local or a remote computer. They provide a database to efficiently browse study data. | |
| An iPACS server is an online PACS servers, a regularly used archiving and retrieval system for medical images. | |
| Local DICOM folder | Allows for browsing and selecting a local directory. All sub-folders will be displayed as projects in the second repository drop-down window. |
| DICOM server | AET is an Application Entity Title. |
| Calling AET: must be a valid AET configured on the server. | |
| Called AET: name of the DICOM servers application entity. | |
| iPACS server | Username and Password are specific to the user of the site’s iPACS system. |
| Hostname is the site of the server for the iPACS, and Port is the communication channel. |
DICOM Server
A DICOM server is specified by a calling AET, a Called AET, as well as a TCP address consisting of a host name and a port (the default settings are localhost:104). The AETs must be configured on the DICOM server. For VivoQuant, use port 23104 on the remote server.
iPACS Server
An iPACS server is specified by setting the appropriate Hostname and Port and by entering user-specific Username and Password. A DEMO iPACS server may be registered by using Hostname: demo.ipacs.invicro.com, Port 80, and leaving Username and Password blank. iPACS servers also enable the use of Projects, a useful tool for organizing DICOM data.
Optimized Local Access
The optimized local access allows for a much faster access to DICOM data. To use this option enter ‘localhost’ (all lower case) as the hostname, and define the ‘DB path’.
iPACS Projects
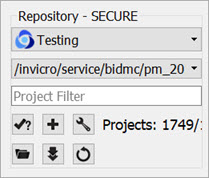
The iPACS repositories allow for the use of projects. A project represents a directory structure for DICOM repositories. Data may be stored and accessed via different projects, aiding organization of DICOM data. In the example below, an iPACS repository for “bioscan/demo” is being configured. The “bioscan/demo” repository contains three projects.
If any projects are present within a configured iPACS repository, a second pulldown menu will appear in the Repository panel of the DICOM browser. All projects within that repository are available via the second pulldown menu. The three projects associated with the “bioscan/demo” repository are shown in the screenshot below.
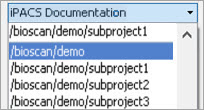
Select a project to view data associated with that project only.
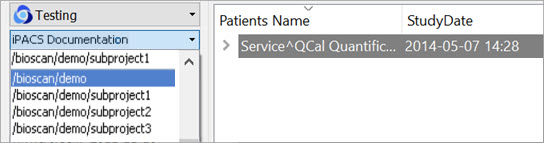
By default, data will only be displayed when the project to which it belongs is selected from the second pulldown menu. For example, in this screenshot, no data appears in the “bioscan/demo” repository because all data within the larger repository belongs to individual projects.
To simultaneously view all data belonging to a repository AND its projects, place an asterisk (*) at the end of the hostname during repository configuration. The asterisk will cause all data within the repository and its projects to be displayed recursively. This behavior applies across all repository and project levels.
