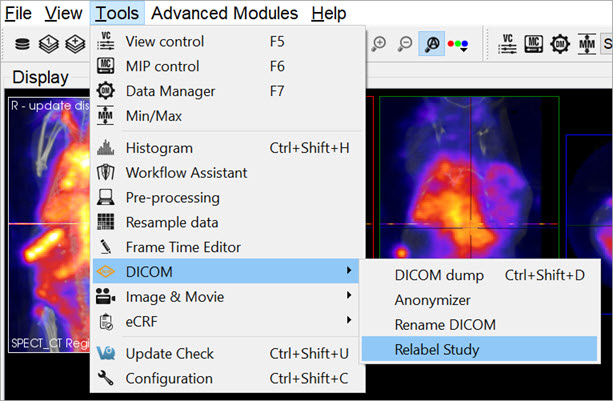
The DICOM Tools submenu contains features to aid in the management of DICOM data.
DICOM Dump
The DICOM Dump tool provides the information contained in the DICOM headers for DICOM files currently loaded in the Main Window. The DICOM Dump is now also compatible with .img and .hdr files.
Getting There
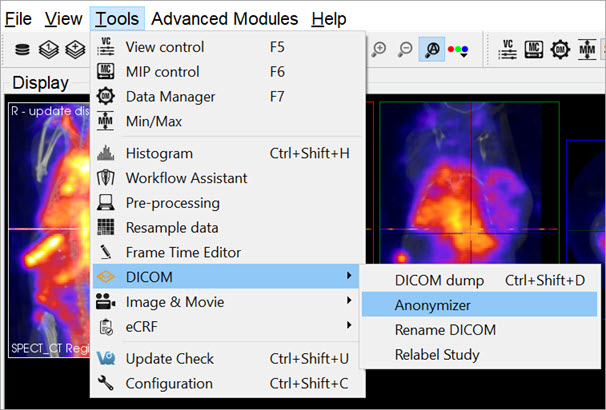
There are three ways to access the DICOM Dump. The first method is via the Tools Menu in theMain Window.
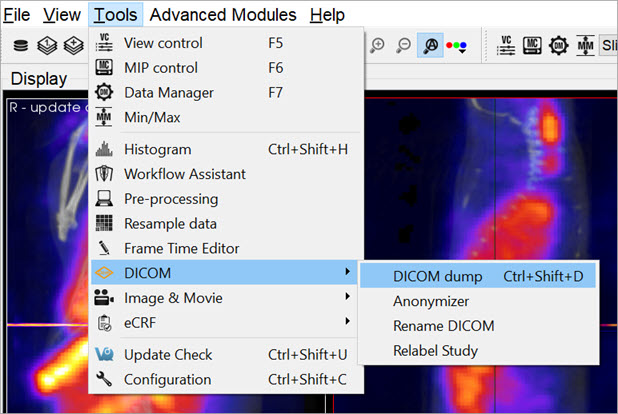
The second method for reaching the DICOM Dump is to use the keyboard shortcut Ctrl+Shift+D.
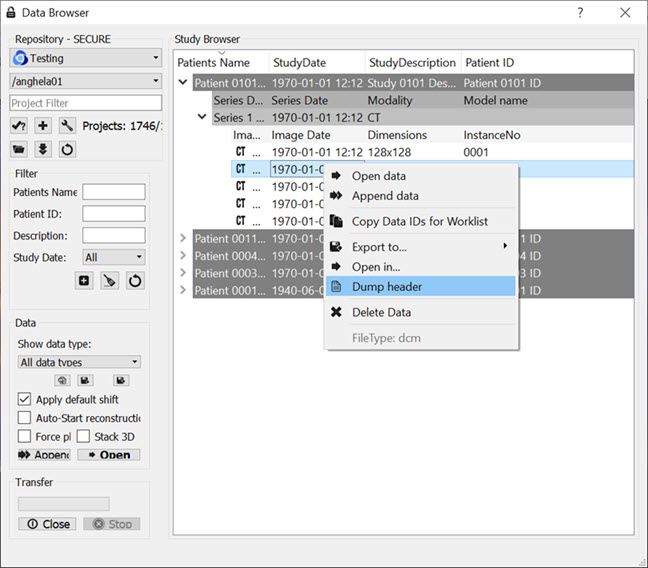
The third method is via the Data Browser. Right click on a dataset and click Dump Header.
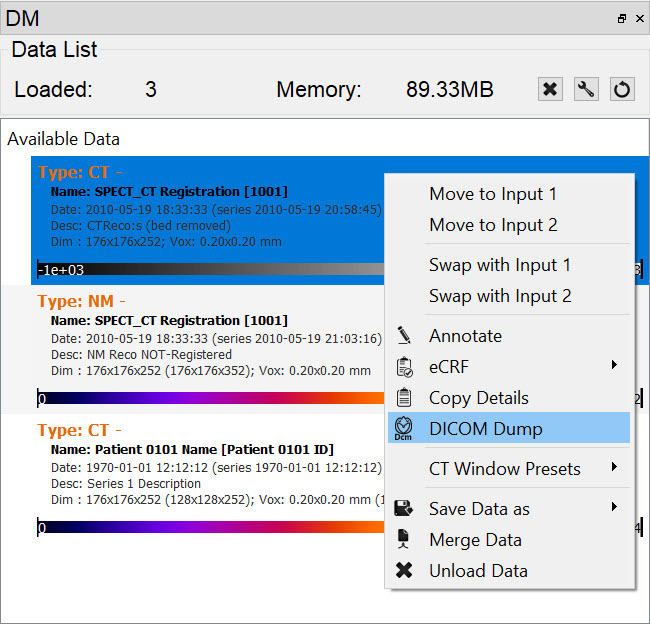
The fourth method is via the Data Manager. Right click on a dataset and click DICOM Dump.
Function
Upon activating the tool, a new DICOM dump window opens, showing information from the DICOM headers for any active datasets. Use the Data set pull-down menu, in the top-left corner, to choose which set of DICOM header information to display.
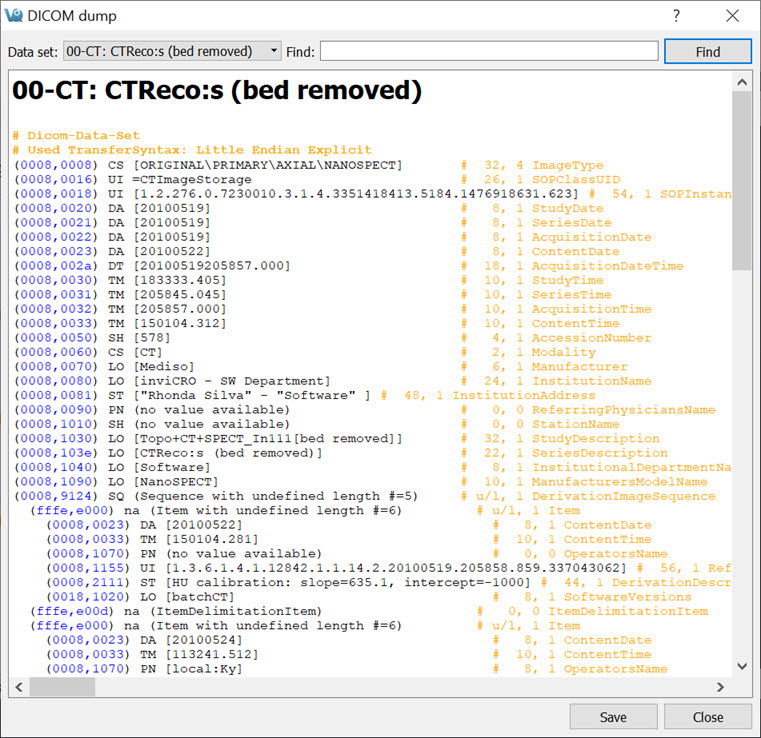
Enter a search string into the Find field, in the upper right portion of the DICOM dump window. The DICOM Dump tool uses the DICOM dictionary listed in the DICOM Configuration to read the DICOM header. Each row in the DICOM Dump represents a DICOM header data entry.
See the dummy DICOM entry below that illustrates the meaning of each field in the DICOM Dump:
(0000,FFFF) |
AZ | [12\18] | # 4,2 |
VQ DICOM Example |
- (
0000,FFFF) is a hexadecimal DICOM address where0000represents the group number for that data entry. Even group numbers correspond to DICOM defined groups, while odd numbers are reserved for private groups. TheFFFFhalf of the address specifies the element number for that particular entry in the group indicated by the first half of the address. - A two-character item of the form AZ identifies the Value Representation (VR) for that data entry. Several VR types are specified in the DICOM standard. For example, a Value Representation of US indicates that the data entry will be in the form “Unsigned Short”.
- The actual data values for the data entry (12,18) are displayed next in the Value Field (VF). The values are shown inside square brackets.
- After the hash mark (
#), the Value Length (VL) for the data entry is displayed. The VL depends on the VR type and the number of values in the data entry. - Some data entries contain multiple subsets as indicated by the Value Multiplicity (VM). Subsets are indicated by the backslash character in the data value field. In the example shown above, there are two subsets: 12 and 18.
- The final element of the DICOM entry is the description of the data entry. For DICOM-defined tags, this field will display relevant information regarding the content of the data entry (i.e.,
VQ DICOM Example). For private tags, this field will displayUnknown Tag and Data.
Anonymizer
The Anonymizer anonymizes the data to the user.
Getting There
Go to the Tools Menu in the Main Window, then to DICOM.
Function
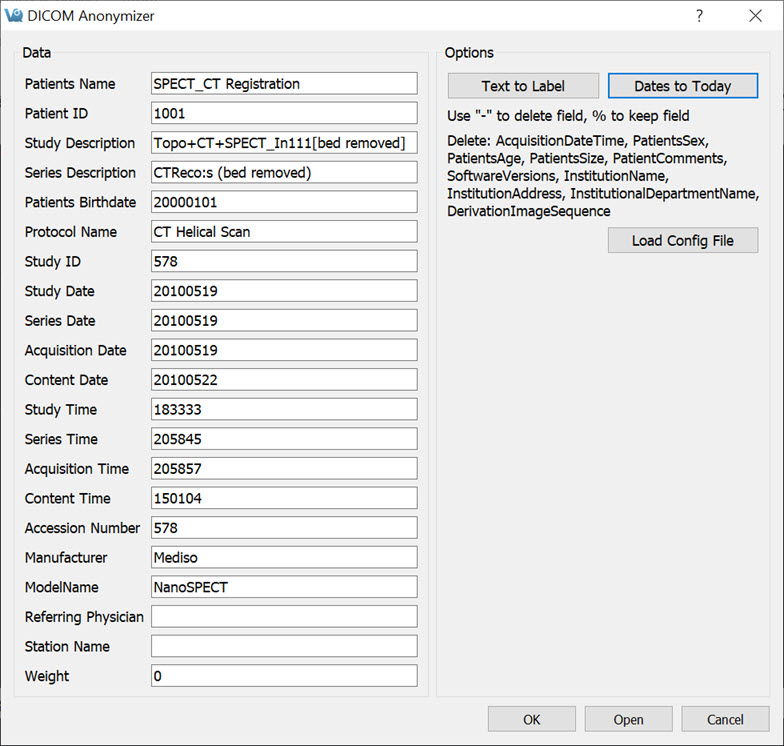
Upon selecting the Anonymizer, a dialog box appears prompting the user to decide whether to anonymize each loaded dataset individually (Yes) or anonymize them all together (No).

In the Anonymizer, header fields can be edited to remove sensitive information, such as the imaging dates, or identifying text fields. The fields can be edited manually or by setting the text to the label of the field and the dates to a new date. The buttons Text to Label and Dates to Today will fill in these sections as described. Use the Load Config File button to upload a configuration file. Selecting OK will apply the changes.
Rename DICOM Files
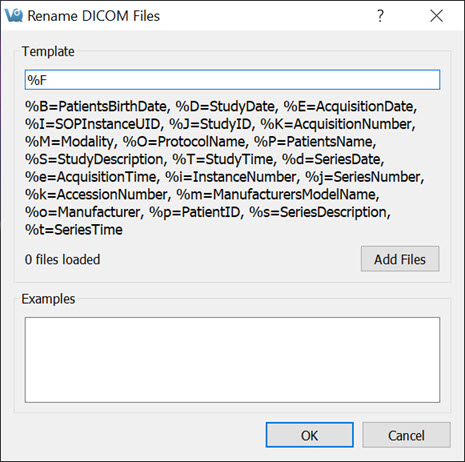
Use the Rename DICOM function to rename locally stored DICOM files according to information from selected fields of the headers.
Getting There
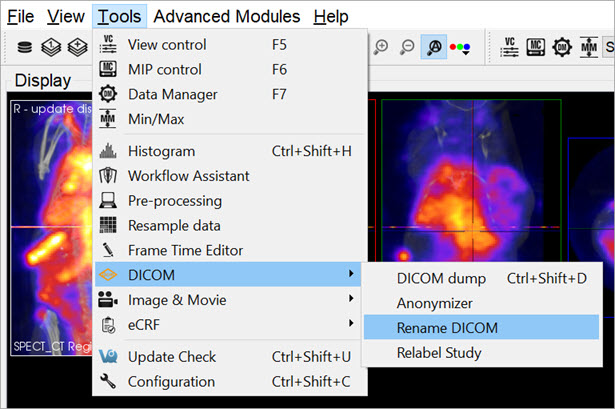
DICOM files can be renamed by selecting Rename DICOM under Tools -> DICOM.
Function
Choose which files to rename by using the Add Files button. Construct new image names by typing into the Template text box, using the key beneath the text box for reference. Each token represents a particular field of the DICOM header. The new names of the selected files will be displayed in the Examples window as they are entered. Names must be unique for the renaming operation to be successful. Renaming will also fail if illegal characters, such as backwards or forwards slashes, are used. To execute renaming, click OK.
Relabel Study
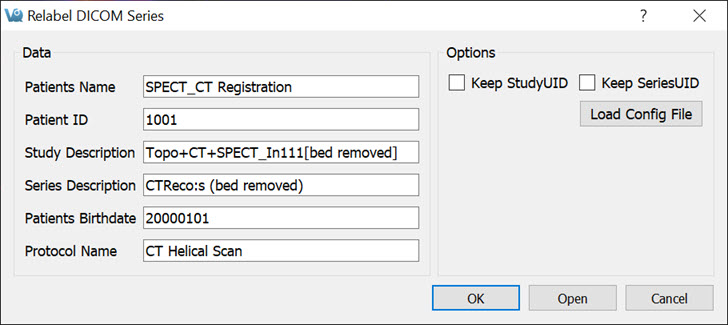
The Relabel Study tool allows for the following fields to be edited or renamed:
- Patient Name
- Patient ID
- Study Description
- Series Description
- Patients Birthday
- Protocol Name
Getting There
Go to the Tools Menu, and then to DICOM.
Function
Upon selecting the Relabel Study option, a dialog box appears prompting the user to decide whether to relabel each loaded dataset individually (Yes) or relabel them all together (No).
Enter the desired Data fields to change. Select the desired Repository and Project to store in the Storage section and click OK, or click Open if no data are already loaded.