Use the Image Magick suite to manipulate frames and movies within VivoQuant. These options are useful for generating appealing and informative dynamic movies.
Getting There
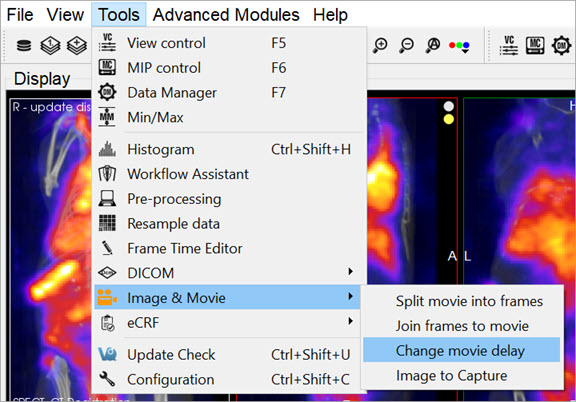
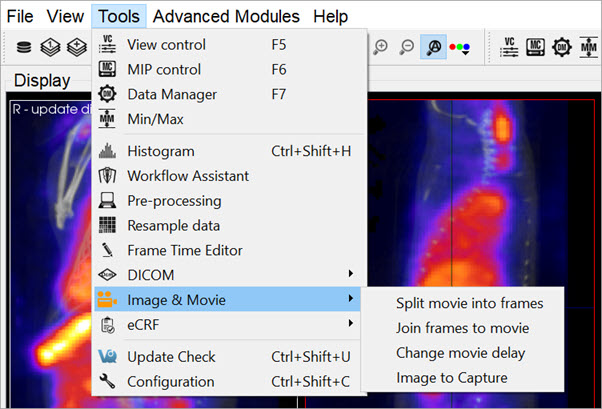
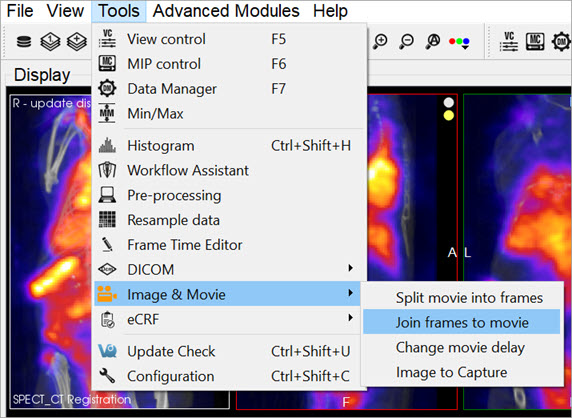
Select the Image and Movie option of the Tools menu.
Function
The Image Magick options available in VivoQuant provide an excellent tool for generating informative movies for dynamic and gated data acquisitions. These tools allow you to combine datasets in meaningful ways to reflect the dynamic nature of the physiological processes taking place.
The Image Magick suite provides four options:
- Split Movie into Frames
- Join Frames to Movie
- Change Movie Delay
- Image to Capture
Split Movie Into Frames
This option takes a movie file (options include .gif, .mpg, .mng, and .mpeg) and splits it into individual frames (options include .png, .bmp, .jpeg, .jpg, and .tif).
Join Frames to Movie
This tool allows you to take individual images (options include .png, .bmp, .jpeg, .jpg, and .tif) and combine them into a movie file (options include .gif, .mng, .mpg, and .mpeg).
Change Delay
Depending on the size and style of the movie taken, the default frame time may be too fast or too slow. This tools allows you to select a pre-existing movie and change the frame time (in milliseconds).
Image to Capture
The Image to Capture feature allows you to load an image or movie from a file on the local machine, edit it, and then re-save it. The Capture Viewer also supports importation of the image/movie into a DICOM/iPACS repository by using the Save Capture button.
How to make dynamic movies
Dynamic and cardiac-gated images and movies are useful for illustrating the changing distribution of radioactivity governed by a dynamic physiological process. This guide provides step-by-step instructions on the proper generation of such files. Use the links to visit the VivoQuant Manual for more details on any particular feature.
Before using this guide, it is important to understand how to process images so that they are color-comparable across multiple frames. Matching color scales between two images is not enough to ensure that they are directly color-comparable. Instead, it is necessary to ensure that the colors in each loaded correspond to the same physical voxel values. You can achieve this relationship using the Min/Max tool to define the range of voxel values spanned across the color bar.
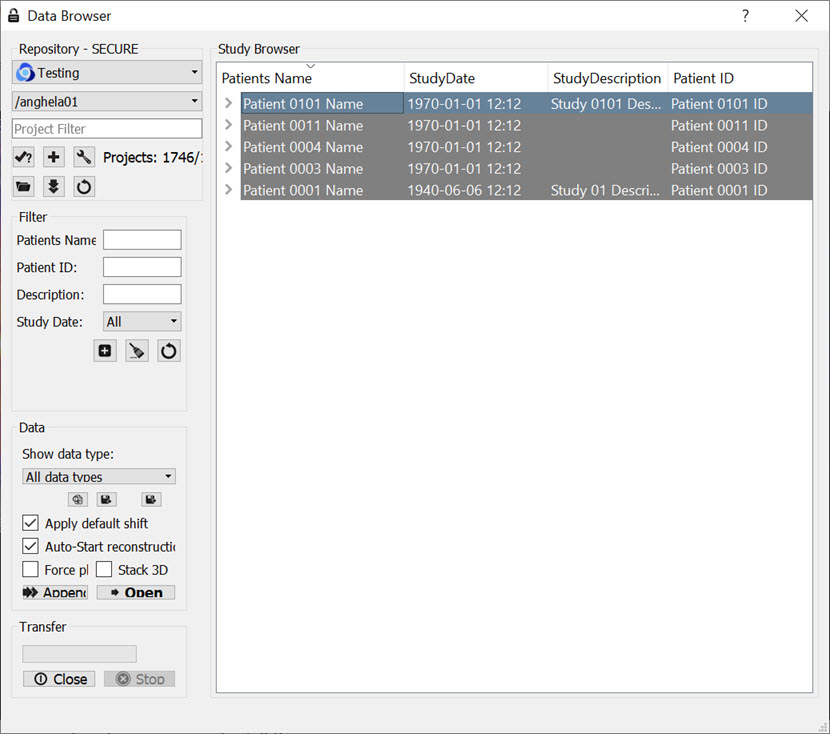
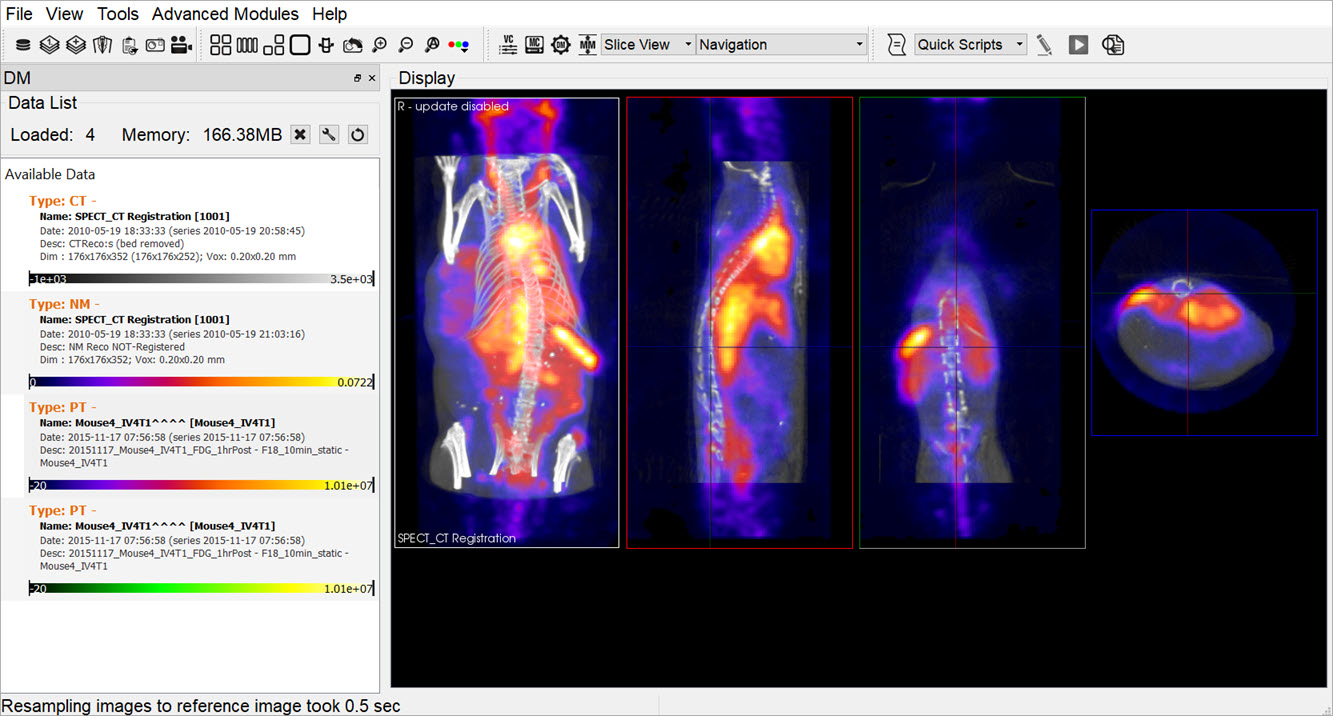
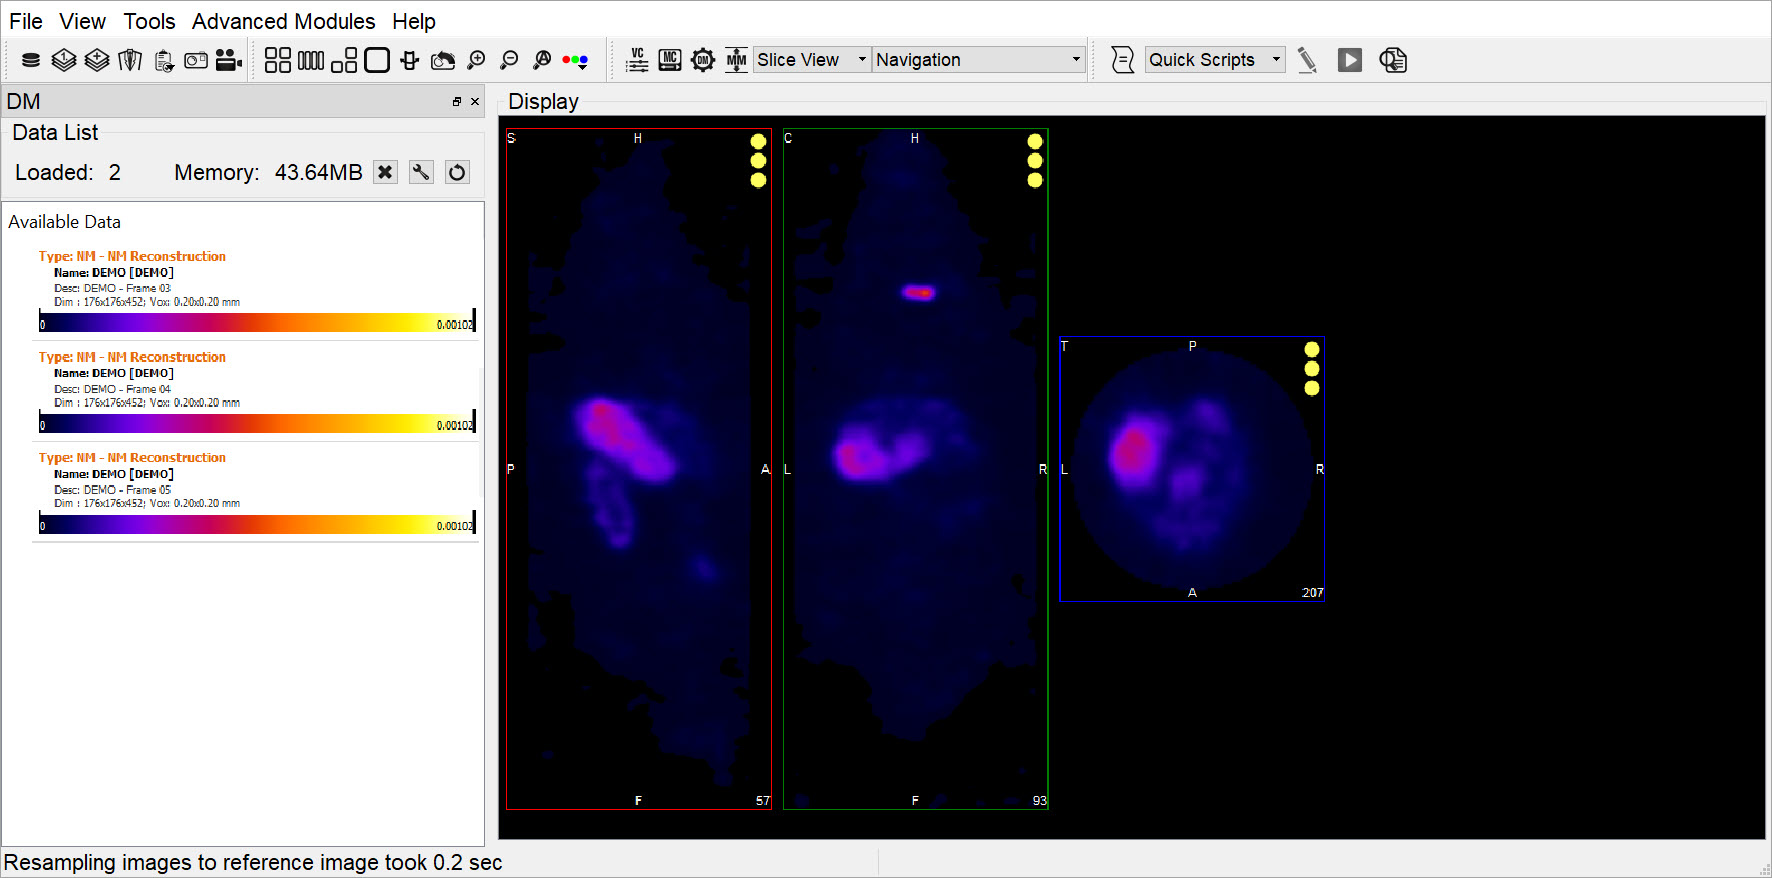
Load all relevant data sets. These data sets may be only SPECT images (as in this example) or a reference CT in addition to multiple SPECT images.
Adjust the Zoom and Color Palettes to your liking.
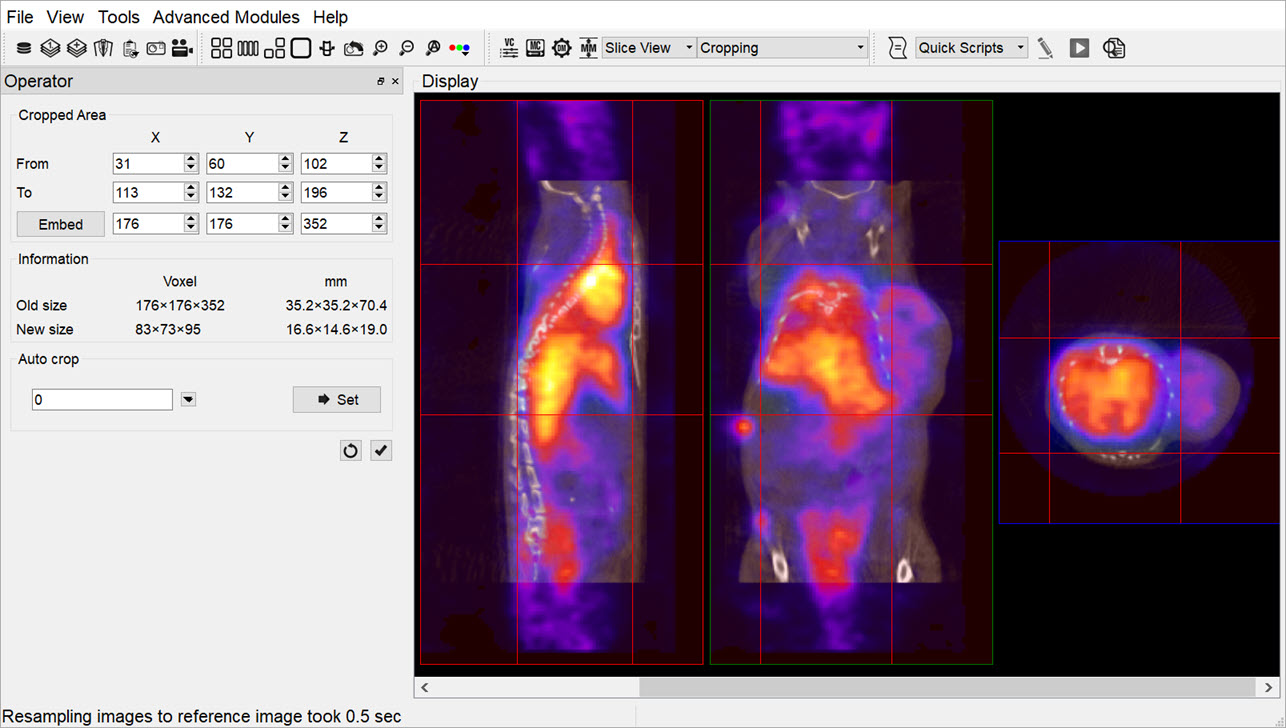
Use the Cropping Tool to select the region of interest.
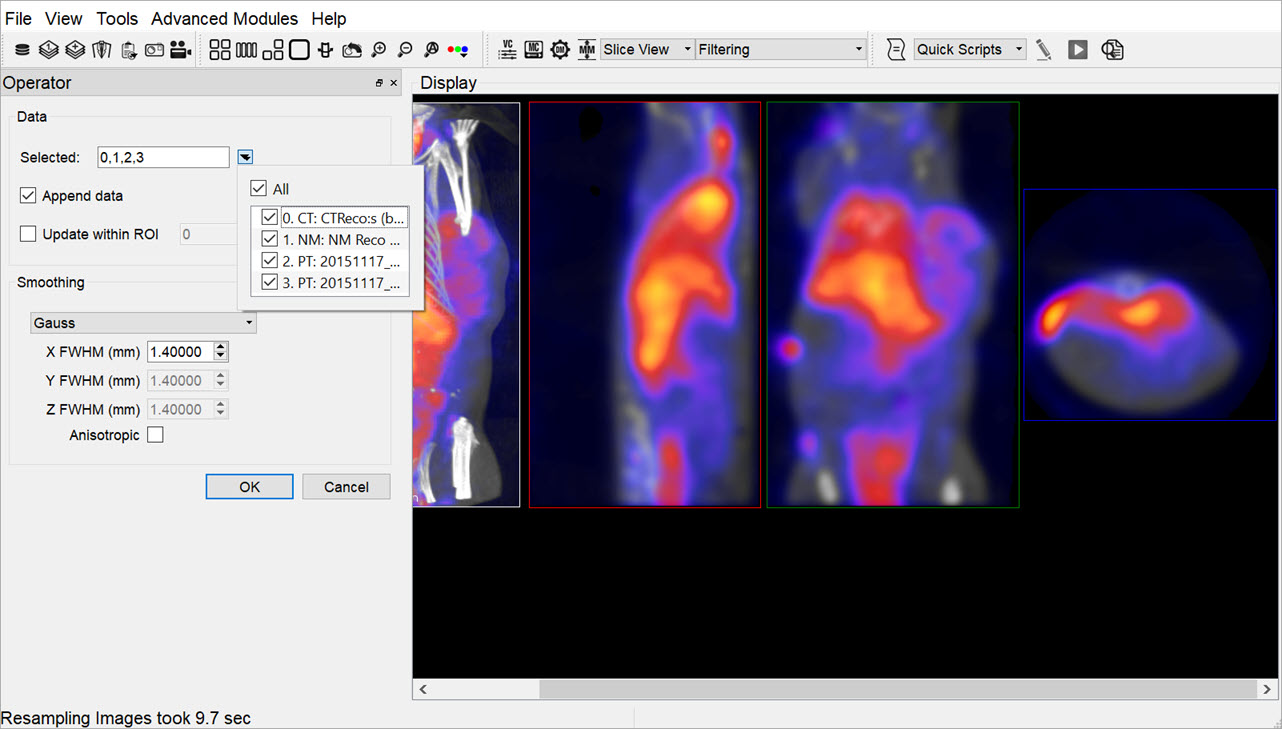
If desired, use the Filtering Operator. Note that if you check Input 3 and higher in the Select pull-down menu of the Filtering operator, then smoothing will be applied to loaded data sets not displayed in the Main Window, but visible in the Data Manager.
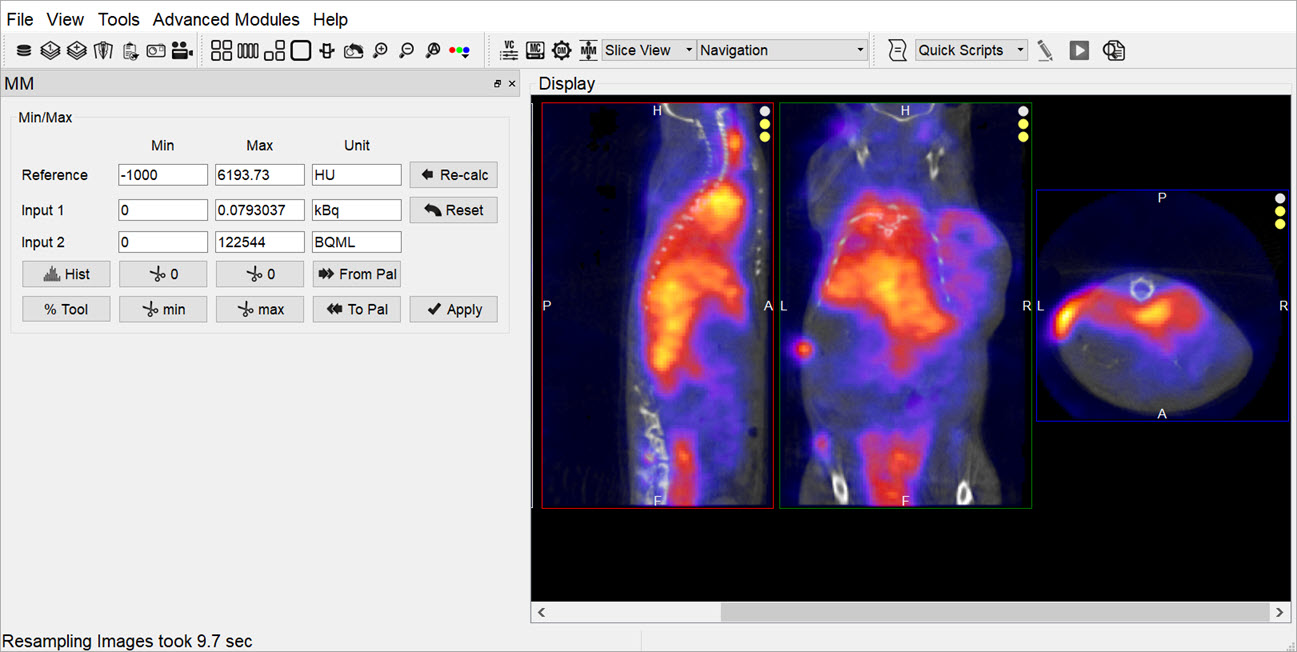
One of the most critical steps is the application of the Min/Max Tool. First, use the Re-Calc button to display the current minimum and maximum values used for color scaling. Choose common Min/Max values across all three data sets. Use the Apply button to adjust the color scaling accordingly. The three visible data sets are now color-consistent: the same colors represent the same voxel values across each data set.
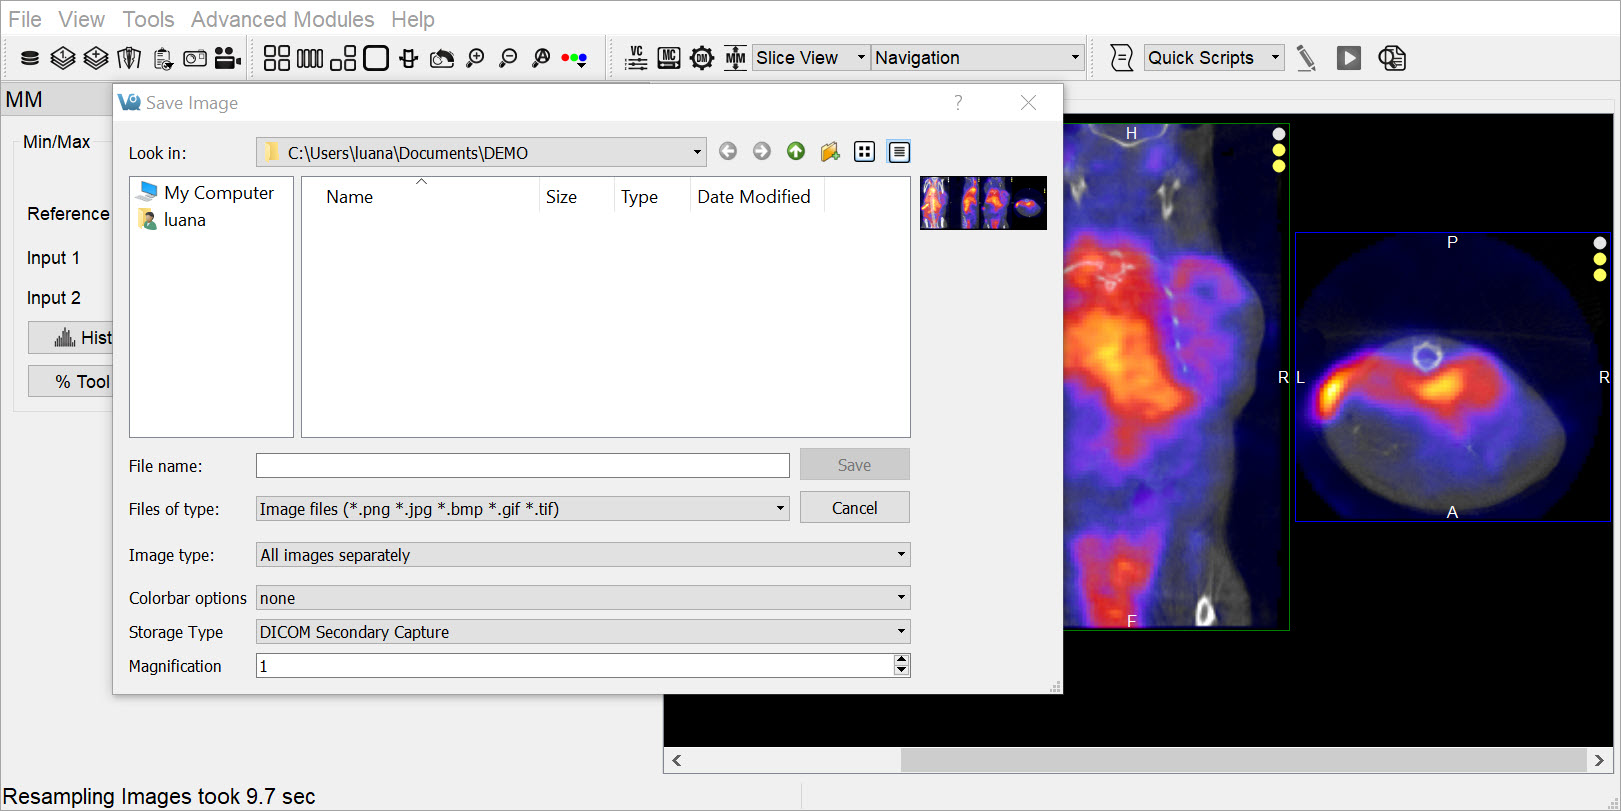
Save images for each data set using the Save Image option. The All s separately option in the Storage Type pull-down automatically saves five images (sagittal, coronal, transverse, MIP, all-in-one) simultaneously.
Use the Slice Control or appropriate Keyboard Shortcuts to toggle between visible data sets and save the appropriate images.
After collecting the images for the first three frames, use the Data Manager to save these processed frames (if desired) and then unload these data sets so that the next three frames in the queue become visible data sets. All operations (such as Cropping, Projection, and Smoothing) applied to the original three data sets are also been applied to the queued data sets, with the exception of the Min/Max tool.
Ensure again that the minimum and maximum values are consistent across datasets, so that the newly loaded data sets are properly prepared. Save the images and data as described above.
After saving all desired images, generate the dynamic movie using the Join Frames to Movie option.
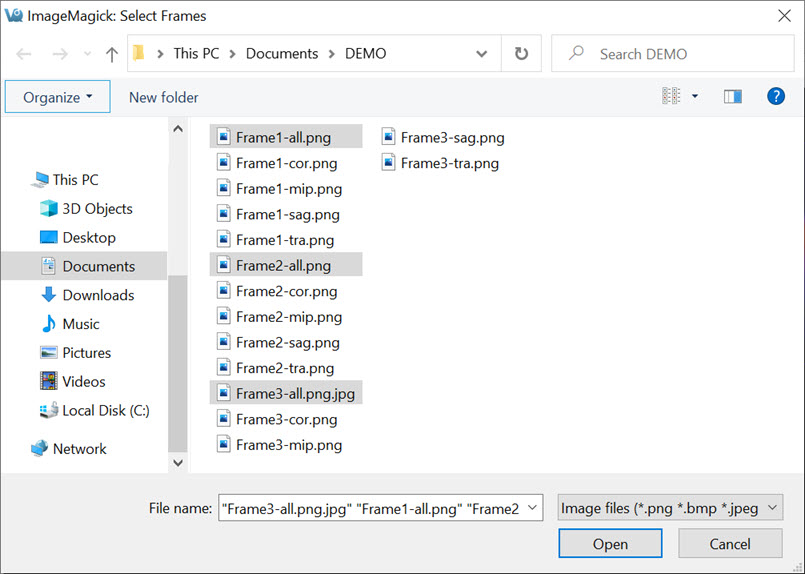
Select the images you wish to include in the movie.
Type in a name and choose a format type for the movie file. The default file format is .gif.
Finally, use the Change Movie Delay option to speed up or slow down the movie frame rate.